Bitmap Fonts
Last Updated 6/09/12
Good fonting programs can be expensive, and sometimes font APIs (like SDL_ttf) are simply not flexible enough. While time consuming, making your own bitmap font engine can be useful. This tutorial will teach you to make a common style bitmap font.Bitmap Fonts tutorial with SDL 2 is now available.
A bitmap font is simply a sprite sheet.
If we wanted to make "HELLO" show on the screen we would do this:
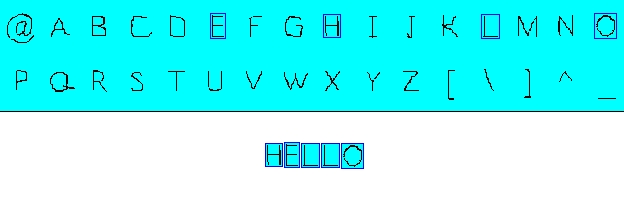 We would take the "H" sprite, the "E" sprite, two of the "L" sprite, and finally the "O" sprite
and then show them on the screen one after the other.
We would take the "H" sprite, the "E" sprite, two of the "L" sprite, and finally the "O" sprite
and then show them on the screen one after the other.
Now that you know the basic concept, it's time to make a bitmap fonting engine.
If we wanted to make "HELLO" show on the screen we would do this:
Now that you know the basic concept, it's time to make a bitmap fonting engine.
//Our bitmap font
class BitmapFont
{
private:
//The font surface
SDL_Surface *bitmap;
//The individual characters in the surface
SDL_Rect chars[ 256 ];
//Spacing Variables
int newLine, space;
public:
//The default constructor
BitmapFont();
//Generates the font when the object is made
BitmapFont( SDL_Surface *surface );
//Generates the font
void build_font( SDL_Surface *surface );
//Shows the text
void show_text( int x, int y, std::string text, SDL_Surface *surface );
};
Here is our bitmap font class.
First thing we have is the surface of the bitmap font. Then we have to have an array of rectangles to clip the letters from the bitmap font. We have 256 of them, one for each of the extended ASCII characters. We have two integers, "newLine" and "space" that determine the distance between lines of text and the distance between two words.
Then we have our constructors. We also have a build_font() to initialize the font. Finally, we have show_text() to show text on the screen.
Uint32 get_pixel32( int x, int y, SDL_Surface *surface )
{
//Convert the pixels to 32 bit
Uint32 *pixels = (Uint32 *)surface->pixels;
//Get the pixel requested
return pixels[ ( y * surface->w ) + x ];
}
First off we need to make a function that gets an individual pixel from a surface.
Why the SDL API doesn't have one built in I'll never know.
First thing we do is convert the pixel pointer from type void to 32bit integer so we can properly access them. After all, a surface's pixels are nothing more than an array of 32bit integers. Then we get or set the requested pixel.
You maybe be wondering why I don't just go "return pixels[ x ][ y ]".
The thing is the pixels aren't stored like this:
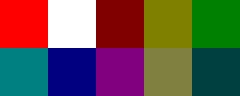
They're stored like this:
 in a single dimensional array.
Its because different operating systems store 2D arrays differently (At least I think that's why).
in a single dimensional array.
Its because different operating systems store 2D arrays differently (At least I think that's why).
So to retrieve the red pixel from the array we multiply the y offset by the width and add the x offset.
These functions only work for 32-bit surfaces. You'll have to make one of your own if you're using a different format.
First thing we do is convert the pixel pointer from type void to 32bit integer so we can properly access them. After all, a surface's pixels are nothing more than an array of 32bit integers. Then we get or set the requested pixel.
You maybe be wondering why I don't just go "return pixels[ x ][ y ]".
The thing is the pixels aren't stored like this:
They're stored like this:
So to retrieve the red pixel from the array we multiply the y offset by the width and add the x offset.
These functions only work for 32-bit surfaces. You'll have to make one of your own if you're using a different format.
BitmapFont::BitmapFont()
{
//Initialize variables
bitmap = NULL;
newLine = 0;
space = 0;
}
BitmapFont::BitmapFont( SDL_Surface *surface )
{
//Build the font
build_font( surface );
}
Here are our constructors.
The first one simply initializes our variables to 0. The second one creates the object and builds the font with the given variables.
The first one simply initializes our variables to 0. The second one creates the object and builds the font with the given variables.
void BitmapFont::build_font( SDL_Surface *surface )
{
//If surface is NULL
if( surface == NULL )
{
return;
}
//Get the bitmap
bitmap = surface;
//Set the background color
Uint32 bgColor = SDL_MapRGB( bitmap->format, 0, 0xFF, 0xFF );
Now it's time to build our font. We have to first check that a valid surface was given to us.
Then we get the actual bitmap font surface from the given argument. Then we set the background color.
Then we get the actual bitmap font surface from the given argument. Then we set the background color.
//Set the cell dimensions
int cellW = bitmap->w / 16;
int cellH = bitmap->h / 16;
//New line variables
int top = cellH;
int baseA = cellH;
Here we calculate the cell width and height. What are cells? Cells are used to arrange the letters on our bitmap
to make it easy to get the individual characters.
A typical bitmap font has the 256 characters in ASCII order. Each of the letters are in a uniformly sized cell and are laid out in 16 columns and 16 rows. It looks like this:
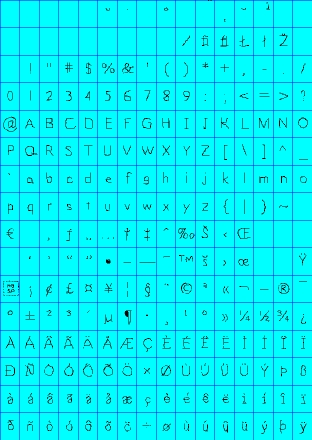 The lines lining the cell don't have to be there, they're just there to show how the cells look. To calculate cell
width, divide the image width by 16 since there are 16 equal columns. The same thing is done with the height.
The lines lining the cell don't have to be there, they're just there to show how the cells look. To calculate cell
width, divide the image width by 16 since there are 16 equal columns. The same thing is done with the height.
The variables "top" and "baseA" are going to be used to calculate how much space we need between lines. You'll see how we use them later.
Now that we've got our bitmap and set the cells, it's time to clip the individual letters.
A typical bitmap font has the 256 characters in ASCII order. Each of the letters are in a uniformly sized cell and are laid out in 16 columns and 16 rows. It looks like this:
The variables "top" and "baseA" are going to be used to calculate how much space we need between lines. You'll see how we use them later.
Now that we've got our bitmap and set the cells, it's time to clip the individual letters.
//The current character we're setting
int currentChar = 0;
//Go through the cell rows
for( int rows = 0; rows < 16; rows++ )
{
//Go through the cell columns
for( int cols = 0; cols < 16; cols++ )
{
First off, we make an integer to keep track of which character we're setting. Then we go through the rows of the
cells, then through each individual column.
//Set the character offset
chars[ currentChar ].x = cellW * cols;
chars[ currentChar ].y = cellH * rows;
//Set the dimensions of the character
chars[ currentChar ].w = cellW;
chars[ currentChar ].h = cellH;
Then we set the default offsets and dimensions of the current character which are the offsets and dimensions of
the cell. Certain ASCII values have no character assigned to them so the default values will never change.
However, most characters will not all have the same x offsets or widths. So we go through the each of the cells to set the unique clip rectangles of each character.
However, most characters will not all have the same x offsets or widths. So we go through the each of the cells to set the unique clip rectangles of each character.
//Find Left Side
//Go through pixel columns
for( int pCol = 0; pCol < cellW; pCol++ )
{
//Go through pixel rows
for( int pRow = 0; pRow < cellH; pRow++ )
{
//Get the pixel offsets
int pX = ( cellW * cols ) + pCol;
int pY = ( cellH * rows ) + pRow;
Now we go through the pixels in the cell. Notice how our nested for loops are structured. We go through each
column, then we go through the column top to bottom.
We calculate the offset by adding the relative pixel offset to the cell's offset.
We calculate the offset by adding the relative pixel offset to the cell's offset.
//If a non colorkey pixel is found
if( get_pixel32( pX, pY, bitmap ) != bgColor )
{
//Set the x offset
chars[ currentChar ].x = pX;
//Break the loops
pCol = cellW;
pRow = cellH;
}
}
}
As we're going through the pixels in the cell, we scan for a pixel that is not of the background color like so:
 When a non background pixel is found that means we found the x offset of the character. We set the x offset of the
sprite then crudely break the loop.
When a non background pixel is found that means we found the x offset of the character. We set the x offset of the
sprite then crudely break the loop.
//Find Right Side
//Go through pixel columns
for( int pCol_w = cellW - 1; pCol_w >= 0; pCol_w-- )
//Go through pixel rows
{
for( int pRow_w = 0; pRow_w < cellH; pRow_w++ )
{
//Get the pixel offsets
int pX = ( cellW * cols ) + pCol_w;
int pY = ( cellH * rows ) + pRow_w;
//If a non colorkey pixel is found
if( get_pixel32( pX, pY, bitmap ) != bgColor )
{
//Set the width
chars[ currentChar ].w = ( pX - chars[ currentChar ].x ) + 1;
//Break the loops
pCol_w = -1;
pRow_w = cellH;
}
}
}
Then we do pretty much the same thing for the width. However, this time we start from the right and move left.
When we find a pixel of the character, the width is calculated by subtracting the x offset from the offset of the
pixel we found and adding one.
//Find Top
//Go through pixel rows
for( int pRow = 0; pRow < cellH; pRow++ )
{
//Go through pixel columns
for( int pCol = 0; pCol < cellW; pCol++ )
{
//Get the pixel offsets
int pX = ( cellW * cols ) + pCol;
int pY = ( cellH * rows ) + pRow;
//If a non colorkey pixel is found
if( get_pixel32( pX, pY, bitmap ) != bgColor )
{
//If new top is found
if( pRow < top )
{
top = pRow;
}
//Break the loops
pCol = cellW;
pRow = cellH;
}
}
}
Here we scan the cell pixels from top to bottom instead of side to side like before. What we're trying to find is
what's the tallest character in our bitmap font.
We use the "pRow" variable because we want the offset relative to the cell. "pY" is the offset relative to the bitmap surface.
We use the "pRow" variable because we want the offset relative to the cell. "pY" is the offset relative to the bitmap surface.
//Find Bottom of A
if( currentChar == 'A' )
{
//Go through pixel rows
for( int pRow = cellH - 1; pRow >= 0; pRow-- )
{
//Go through pixel columns
for( int pCol = 0; pCol < cellW; pCol++ )
{
//Get the pixel offsets
int pX = ( cellW * cols ) + pCol;
int pY = ( cellH * rows ) + pRow;
//If a non colorkey pixel is found
if( get_pixel32( pX, pY, bitmap ) != bgColor )
{
//Bottom of a is found
baseA = pRow;
//Break the loops
pCol = cellW;
pRow = -1;
}
}
}
}
//Go to the next character
currentChar++;
}
}
If the current cell we're scanning belongs to capitial A, we're going to find the bottom of A relative to cell.
We're going to use this as our baseline. Certain characters like g, j, and y have their character image go below
the baseline. You'll see how we use the baseline later.
Once we're done setting the current character, we increment the counter to move onto the next character.
Remember, in order for this function to work properly the bitmap font has to have the 256 characters in ASCII order and laid out in 16 columns and 16 rows. Any other way would require you to create your own building function.
//Calculate space
space = cellW / 2;
//Calculate new line
newLine = baseA - top;
//Lop off excess top pixels
for( int t = 0; t < 256; t++ )
{
chars[ t ].y += top;
chars[ t ].h -= top;
}
}
After we're done going through all the cells, we do some extra things to properly space the text.
We set the space to be half the cell width. "newLine" which is how much space is between lines of text. It's set to be the baseline minus highest known character height.
At the end of font loading function, we go through the character clip rectangles and cut off the extra pixels on top.
We set the space to be half the cell width. "newLine" which is how much space is between lines of text. It's set to be the baseline minus highest known character height.
At the end of font loading function, we go through the character clip rectangles and cut off the extra pixels on top.
void BitmapFont::show_text( int x, int y, std::string text, SDL_Surface *surface )
{
//Temp offsets
int X = x, Y = y;
Now here's the function that actually shows the text.
First thing we do is get the given offsets and store them in the temp offsets. The offsets given in the arguments serve as base offsets, the temp offsets are where the next sprite will be blitted.
First thing we do is get the given offsets and store them in the temp offsets. The offsets given in the arguments serve as base offsets, the temp offsets are where the next sprite will be blitted.
//If the font has been built
if( bitmap != NULL )
{
//Go through the text
for( int show = 0; show < text.length(); show++ )
{
Then we check if a bitmap was given for us to use. If there is one, we go through the characters in the string.
//If the current character is a space
if( text[ show ] == ' ' )
{
//Move over
X += space;
}
//If the current character is a newline
else if( text[ show ] == '\n' )
{
//Move down
Y += newLine;
//Move back
X = x;
}
First thing we do here is check if the current character is a space or a newline.
If the character is a space, we move over the space assigned in the build_font() function. If the character is a newline the temp offset goes down the cell height, and then moves back to the base x offset.
If the character is a space, we move over the space assigned in the build_font() function. If the character is a newline the temp offset goes down the cell height, and then moves back to the base x offset.
else
{
//Get the ASCII value of the character
int ascii = (unsigned char)text[ show ];
//Show the character
apply_surface( X, Y, bitmap, surface, &chars[ ascii ] );
//Move over the width of the character with one pixel of padding
X += chars[ ascii ].w + 1;
}
}
}
}
If the current character is not one of our special characters we apply the character's sprite on the screen.
To show the character first we have to get the ASCII value by type casting the character to an integer. Then we apply the sprite onto the screen. This is easily done since the sprites are in ASCII order.
Then the temp offset is moved over the width of the sprite plus one. That way the next sprite will be applied next to the previous sprite with one pixel of padding.
We keep looping through this until all the characters are shown.
//Create our font
BitmapFont font( bitmapFont );
//Fill the screen white
SDL_FillRect( screen, &screen->clip_rect, SDL_MapRGB( screen->format, 0xFF, 0xFF, 0xFF ) );
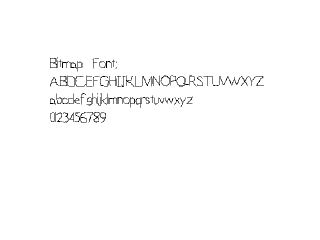
//Show the text
font.show_text( 100, 100, "Bitmap Font:\nABDCEFGHIJKLMNOPQRSTUVWXYZ\nabcdefghijklmnopqrstuvwxyz\n0123456789", screen );
//Update the screen
if( SDL_Flip( screen ) == -1 )
{
return 1;
}
Here's a basic demonstration of our bitmap class that we do in the main() function.
All we do is create a font object, fill screen white, apply some text, and update the screen.
All we do is create a font object, fill screen white, apply some text, and update the screen.