Color Keying
Last Updated 1/1/14
Now you're going to learn how to color key. In English that means this lesson is going to teach you how to remove the background color when applying a surface.The SDL_Surface structure has an element called the color key. The color key is the color you don't want to show up when blitting the surface. It's what you use when you want to have transparent backgrounds.
A Color Keying tutorial with SDL 2 is now available.
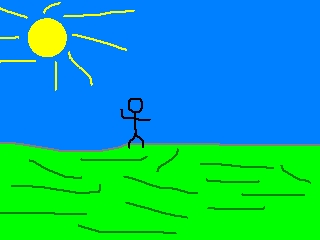
Say you wanted to apply this stick figure named "Foo":

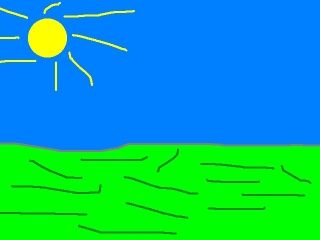
To this background:
But you didn't want this blue background from the stick figure to pop up:
In order for the blue background not to show up you have to set the background's color (which in this case is Red 0, Green FF, Blue FF) to be the surface's color key.
The color key is typically set when the image is loaded.
SDL_Surface *load_image( std::string filename )
{
//The image that's loaded
SDL_Surface* loadedImage = NULL;
//The optimized image that will be used
SDL_Surface* optimizedImage = NULL;
//Load the image
loadedImage = IMG_Load( filename.c_str() );
//If the image loaded
if( loadedImage != NULL )
{
//Create an optimized image
optimizedImage = SDL_DisplayFormat( loadedImage );
//Free the old image
SDL_FreeSurface( loadedImage );
So here's the image loading function we're going alter.
First we load and optimize the image like before.
First we load and optimize the image like before.
//If the image was optimized just fine
if( optimizedImage != NULL )
{
//Map the color key
Uint32 colorkey = SDL_MapRGB( optimizedImage->format, 0, 0xFF, 0xFF );
Then we check if the image was optimized.
If the image was optimized, we have to map the color we want to set as the color key. We call SDL_MapRGB() to take the red, green, and blue values and give us the pixel value back in the same format as the surface. You can learn more about pixels in article 3.
If the image was optimized, we have to map the color we want to set as the color key. We call SDL_MapRGB() to take the red, green, and blue values and give us the pixel value back in the same format as the surface. You can learn more about pixels in article 3.
//Set all pixels of color R 0, G 0xFF, B 0xFF to be transparent
SDL_SetColorKey( optimizedImage, SDL_SRCCOLORKEY, colorkey );
}
Now it's time to do the actual color keying.
The first argument is the surface we want to set the color key to.
The second argument holds the flags we want to place. The SDL_SRCCOLORKEY flag makes sure that we use the color key when blitting this surface onto another surface.
The third argument is the color we want to set as the color key. As you see it's the color we mapped just a moment ago.
//Return the optimized image
return optimizedImage;
}
Then the surface loading function returns the optimized and color keyed surface.
//Apply the surfaces to the screen
apply_surface( 0, 0, background, screen );
apply_surface( 240, 190, foo, screen );
//Update the screen
if( SDL_Flip( screen ) == -1 )
{
return 1;
}
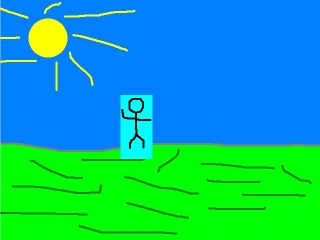
Now the background is blitted, then the color keyed stick figure image is blitted.
 Now there's no blue background around the stick figure.
For those of you using transparent PNGs, IMG_Load() will automatically handle transparency. Trying to color key an image that already has a transparent background is going to cause funky results. You'll also lose the alpha transparency if you use SDL_DisplayFormat() instead of SDL_DisplayFormatAlpha(). To retain transparency on the PNG simply don't color key it. IMG_Load() will also handle alpha from TGA images. Look in the SDL documentation for more detailed information on color keying.
For those of you using transparent PNGs, IMG_Load() will automatically handle transparency. Trying to color key an image that already has a transparent background is going to cause funky results. You'll also lose the alpha transparency if you use SDL_DisplayFormat() instead of SDL_DisplayFormatAlpha(). To retain transparency on the PNG simply don't color key it. IMG_Load() will also handle alpha from TGA images. Look in the SDL documentation for more detailed information on color keying.