Setting up SDL Extension Libraries for XCode
Last Updated 9/17/12
In this tutorial you're going to learn to set up SDL_image. If you know how to set up this extension, you can set any of them up.SDL_image is located on this page.
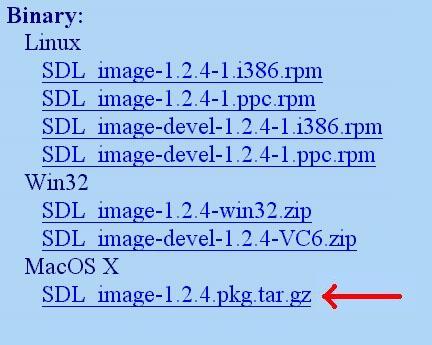
1)Scroll down to the Binary section and download the Mac OS X package:
2)Copy the SDL_image.framework folder from the runtime library package to /Library/Frameworks.

If you were setting up SDL_ttf you'd copy
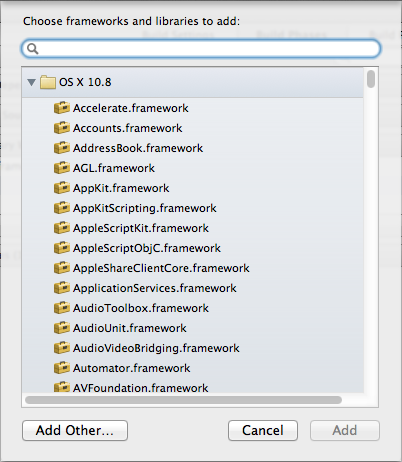
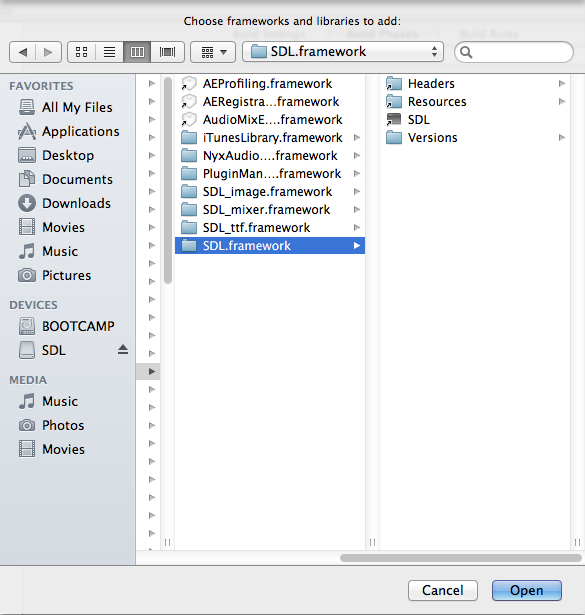
3)Open up your SDL project. In the Build Phases Tab under Link Binary With Libraries add the SDL_image framework. Click Add Other to bring up the file selector menu and then hit command+shift+g to go the /Library/Frameworks directory and open the SDL_image.framework framework.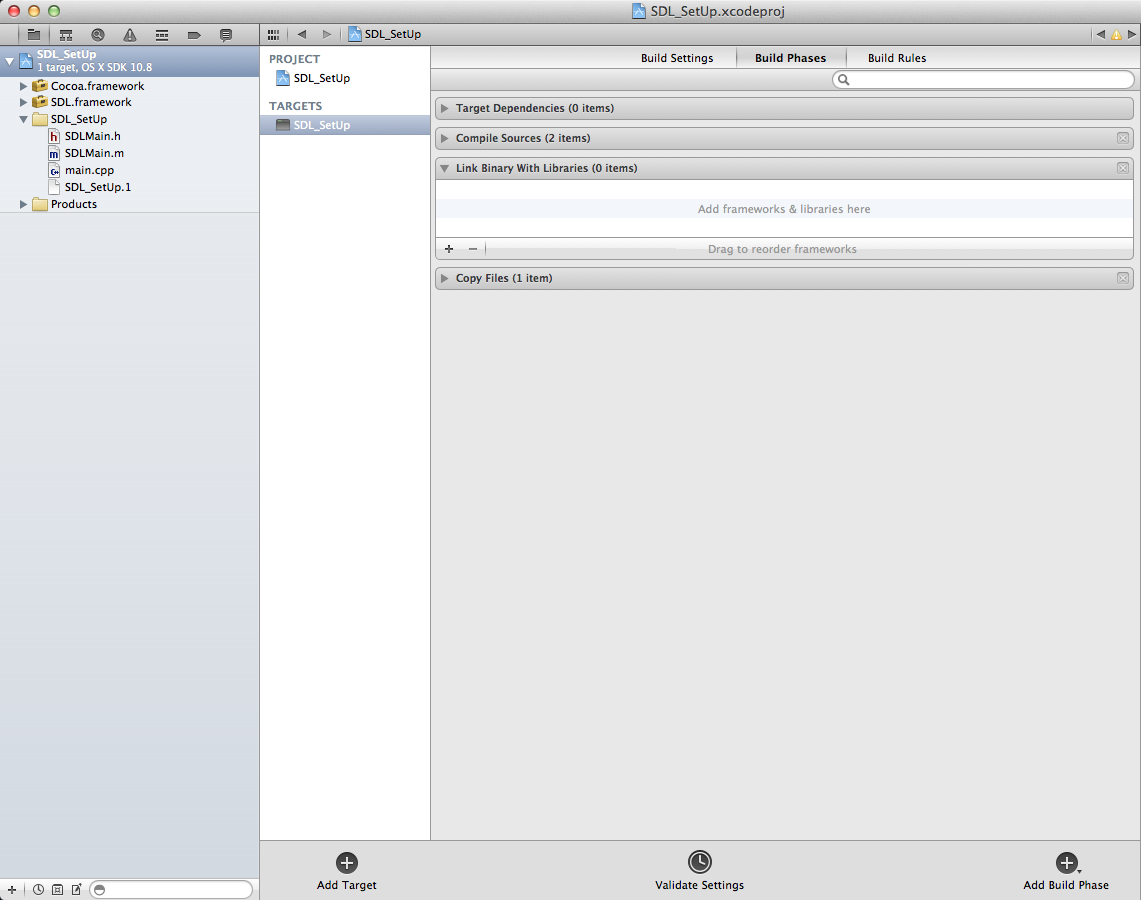
4)To use SDL_image make sure to include the header file.
2)Copy the SDL_image.framework folder from the runtime library package to /Library/Frameworks.
If you were setting up SDL_ttf you'd copy
SDL_ttf.framework
if you were setting up SDL_mixer you'd putSDL_mixer.framework
etc, etc.3)Open up your SDL project. In the Build Phases Tab under Link Binary With Libraries add the SDL_image framework. Click Add Other to bring up the file selector menu and then hit command+shift+g to go the /Library/Frameworks directory and open the SDL_image.framework framework.
4)To use SDL_image make sure to include the header file.
#include "SDL_image/SDL_image.h"
If you were setting up SDL_ttf you'd put
Now the extension library is all set up.
#include "SDL_ttf/SDL_ttf.h"
If you were setting up SDL_mixer you'd put#include "SDL_mixer/SDL_mixer.h"
etc, etc.Now the extension library is all set up.
Now you can use SDL_image functions.
The main one you want to know about is IMG_Load().
The main one you want to know about is IMG_Load().
SDL_Surface *load_image( std::string filename )
{
//The image that's loaded
SDL_Surface* loadedImage = NULL;
//The optimized image that will be used
SDL_Surface* optimizedImage = NULL;
//Load the image using SDL_image
loadedImage = IMG_Load( filename.c_str() );
//If the image loaded
if( loadedImage != NULL )
{
//Create an optimized image
optimizedImage = SDL_DisplayFormat( loadedImage );
//Free the old image
SDL_FreeSurface( loadedImage );
}
//Return the optimized image
return optimizedImage;
}
Here is a revised version of the image loading function from the previous tutorial.
As you can see IMG_Load() functions exactly the same as SDL_LoadBMP(), but there's one big exception:
IMG_Load() can load BMP, PNM, XPM, LBM, PCX, GIF, JPEG, TGA and PNG files.
From this tutorial on, PNG image files will be the primary image format used. PNGs have excellent lossless compression.
In the tutorials ahead, the example source codes include the SDL extensions differently.
From this tutorial on, PNG image files will be the primary image format used. PNGs have excellent lossless compression.
In the tutorials ahead, the example source codes include the SDL extensions differently.
#include "SDL/SDL_image.h"
#include "SDL/SDL_ttf.h"
#include "SDL/SDL_mixer.h"
This is how both Linux and Windows do it. Since this is how most platforms do it, it's how my example programs do it. To get the example programs to work with Mac OS X, simply remember to change how the SDL extension headers are included.